
Project Name:
It Takes A Showcase
My Contribution:
Level Design, Set Dressing & C++ Scripting
Project Info
Team Members
1 (myself, solo project)
My contribution to the project
Level Design, Set Dressing & C++ Scripting
Time To Complete
1.5 weeks
Year
2022
Genre
Platforming, puzzle, co-op
End Goal
Complete a playable level
Tools Used
Unreal Engine 4, Visual Studio
About The Project
"It Takes A Showcase" is a platforming co-op game where the two players have to combine their mechanics in order to solve puzzles and progress through the level and reach the goal.
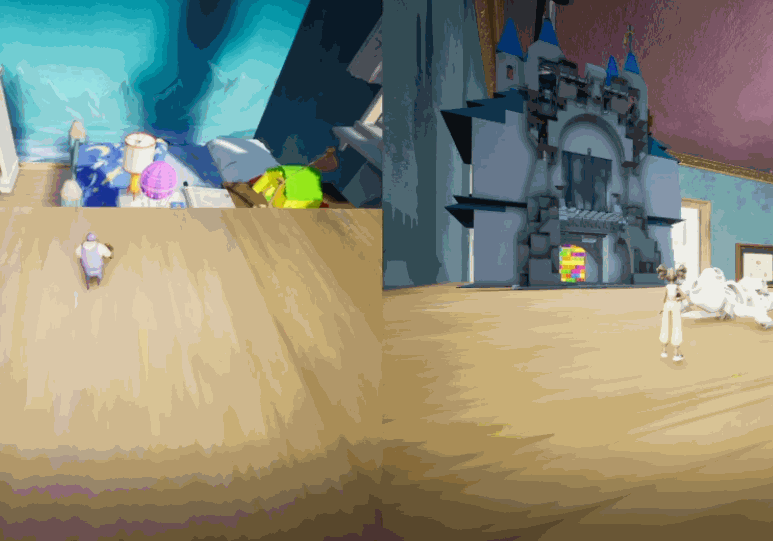
The end goal is to reach the castle.
The castle is visible as a landmark at the start of the level to help guide the players to the goal.
Project Showcase
My goal for this project was to challenge myself and design a similar level and mechanics
akin to the the game "It Takes Two".
The whole project is made from scratch by myself from a blank project to fully playable level using Unreal Engine 4 and various 3D models.
Player mechanics and movement is scripted in C++ with some features extended in blueprints inheriting from the C++ class.
The gifs are showcasing the end result of the completed project as seen below:


Level Layout
The players goal at the start is to get to the castle.
The castle can be seen at the start of the level guiding the players to the goal.
The players will be gated by a door at the start to ensure that they learn their respective mechanics and then combine their mechanics in order to break through the door at the start.
A visual image of the level layout can be seen below:

Level Walkthrough
1

Onboarding at the start of the level is in a safe space
with no enemies.
Teaching the players the co-op shoot and explode mechanic. Gating the players until they learn by having a blocking door they need to destroy together.
2


Since players previously learnt that certain objects can be destroyed. They might notice the familiar color and pattern of the door on the cube.
The will have to reuse the previously learnt mechanic to destroy the cube in order to create a bridge that they later walk on top of to progress to the next area of the level.
3

One player needs to constantly stand on top of the platform as seen above for the cubes to appear.
While one player stands, the other player can jump on top of each cube until they reach the next area of the level. How the other player that stands on the platform reaches the same area can be seen in the image below.
4

When the other player has jumped on top of the cubes and reached the next area. Another platform can be found as seen in the image above.
This platform enables the other player to be "escorted" to the location of the player that is pressing the platform by jumping on top of the balloon.
Afterwards both players are reunited and can progress to the next part of the level together.
5

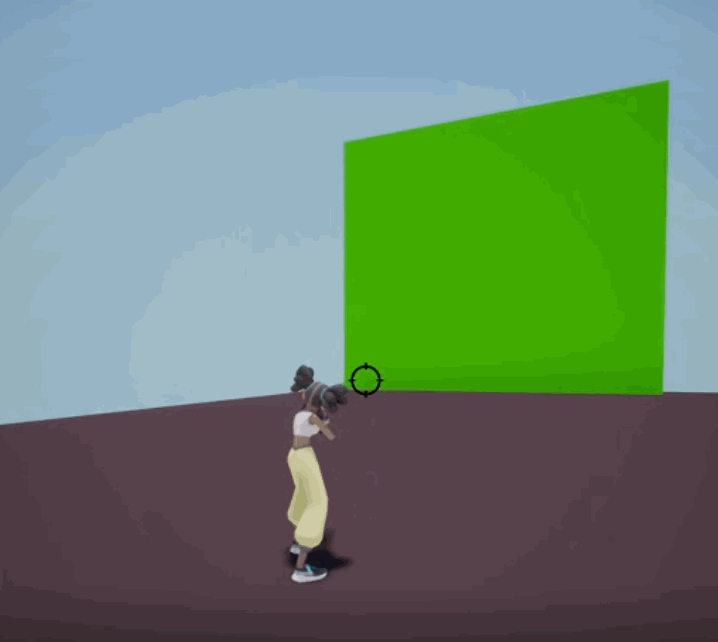
At this area the players learn the climbable wall mechanic. Which means that the players can shoot the dots at the green board as seen above in order to make a climbable wall.
The objects next to the wall are angled towards the green board to help draw the attention to the board.
6

As seen above is the same blocking door obstacle seen in the first part of the level. The roof is a different color to give some variety.
The reason for reusing this blocking door is to gate the players from entering the house until both players are present at the door.
Since the first enemy encounter will be present after this area both players need to be close to each other before entering the door.
And since both players need to combine their mechanics to break the door, reusing the blocking door gates both players until the door is destroyed.
Preventing one player to encounter an enemy without the other player being present.
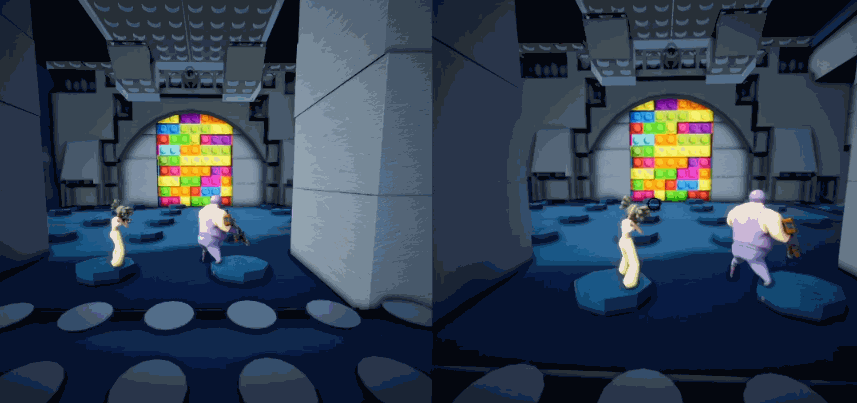
7

After destroying the blocking door the first enemy encounter will show up.
Both players are needed to defeat the enemies since they have to combine their mechanics by one freezing the enemy and the other exploding the enemy once it has been frozen.
8

After defeating the enemies the players are presented with a recurring puzzle (the make bridge puzzle) as seen above.
To increase the difficulty however, the puzzle is a bit elevated and it also mixes things up by adding more verticality to the level.
There is also a bit foreshadowing of the castle end goal by adding a castle tower as seen in the screenshot above.
It suggests to the players that they are moving at the right direction.
9

The "draw the dots" green board is reused but this time with increased difficulty of having the player jump further and higher than before.
10

Since a second enemy encounter is going to occur after walking through the door. Gating with a blocking destructible door is reused again.
However, the difference here is that the house has the same colors as the castle, hinting to players that they are very close to the goal which is to reach the castle.
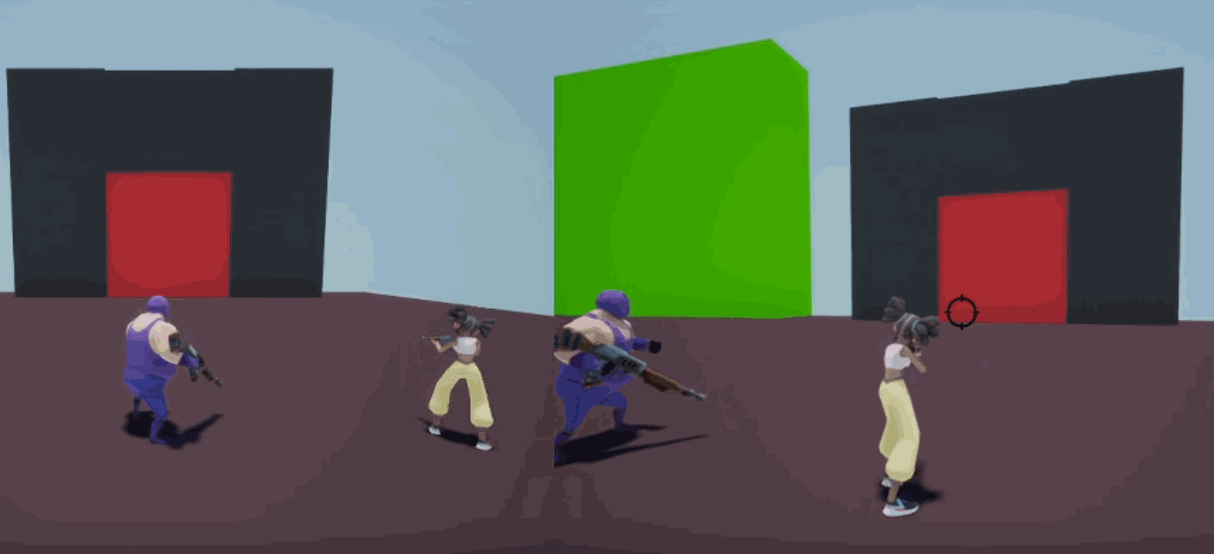
11


The second and final enemy encounter in the level. This time the enemies are 3 instead of 2 for subtle increase in difficulty.
12

After defeating the final enemies the players can see how far they have come by looking down while standing at the edge.
The starting area where the players began is clearly visible as seen in the screenshot above.
The level is designed with being able to clearly see in a visual way how far players have gone from the starting area in almost all places of the level.
This design approach will give players a clear visual of progress throughout the level.
13

In the screenshot above the final castle goal is reached.
Players by now are well familiar with the colors and the pattern of objects that are destructible.
They only need to band together one last time and combine their mechanics to destroy the door and complete the level.
First Iteration Of Project
(Prototyping Game Mechanics)
Before creating the blockout of the level I started with prototyping the mechanics for both players.
The reason for this is because the mechanics and level design of this project are closely working together with each other and to create a good level that would utilize the mechanics I needed to have the mechanics ready first.
Each gif showcases all the mechanics utilized in the level design of this project as seen below:
Climbable Wall Mechanic
One of the players can make a climbable wall by shooting at the wall.
Destructible Wall Mechanic
One of the players freezes the wall by shooting at it.
The other player explodes the wall by shooting at it once it has been frozen.
Make Bridge Mechanic
One of the players freezes the object holding "the bridge" by shooting at it.
The other player explodes the object by shooting at it once it has been frozen.
When the object holding "the bridge" is destroyed "the bridge" falls down and the players can move on top of it to progress to the next part of the level.
Double Jump Mechanic
Both players can double jump.
Second Iteration Of Project
(Prototyping Level Layout)
With the mechanics done. I had a foundation to base my level design layout on.
I started drawing the level layout in 2D first to get a quick sense of how the level should look like.
A screenshot of the level layout in 2D can be seen below:


Good Use Of Verticality
I designed the level to have a good use of verticality.
The reason for this is because the level is short. And if lots of verticality is used, it will make it easy for the players to feel a sense of progression, since the level is constantly moving upwards in verticality.
The verticality also helps utilizing the mechanics used in the level.
Third Iteration Of Project
(Blockout Of Level)
With the planning of the level layout done I started doing the blockout of the level
using the 2D layout as a reference when building.
Upon play testing I discovered a problem of a recurring puzzle
that was repeated too close to the other recurring puzzle.
I solved it by switching places with two puzzles to avoid that repetition.
The solution can be seen in the screenshot below:

BEFORE

AFTER
Fourth Iteration Of Project
(Finalizing The Level)
After doing the blockout and playtesting the level I started finalizing the level with art assets.
Every 3D model is manually placed one by one by myself.
A total of 46 3D models were used (some are instances of the same 3D model).
All the 3D models used and the end result can be seen in the screenshots below:


46 3D models were used to create the final level
every model is placed one by one manually by myself
(Player Guidance)
Landmark Goal
To help guide the players to the goal (castle), the castle landmark can be seen throughout the level in different angles.
This enables the players a clear view of the goal throughout the level.
As seen on the screenshots below:

Landmark goal

Landmark goal

Landmark goal

Landmark goal
(Player Guidance)
Foreshadowing Landmark
To help indicate to the player that they are near the goal (castle).
Players will at a point in the level walk past a foreshadowing landmark.
A visual representation can be seen on the screenshot below:

Foreshadowing the castle to hint to the players
that they are near the goal
(Player Guidance)
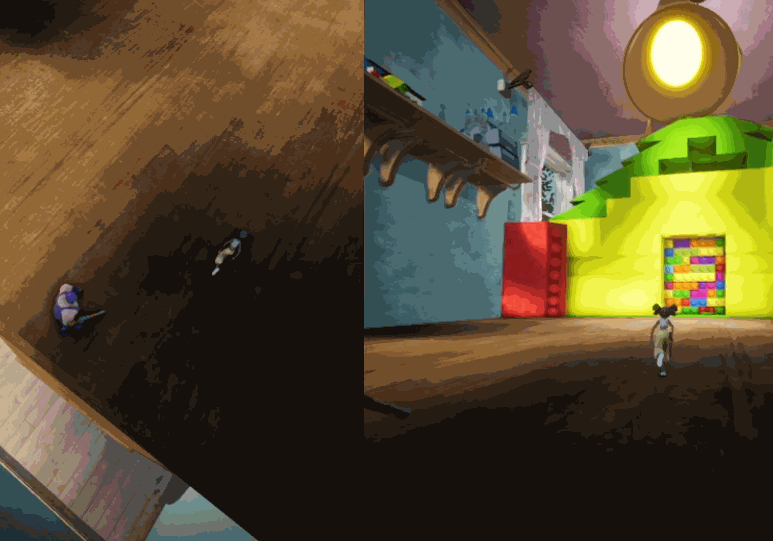
Designed To Give A Clear Visual Of Progress
The level is designed to be able to see the starting area throughout the progression of the level.
This in turn will give players a clear visual of progress when moving further away form the start area of the level.
The screenshots below showcase how the level is designed to give a clear visual of progress:


(Player Guidance)
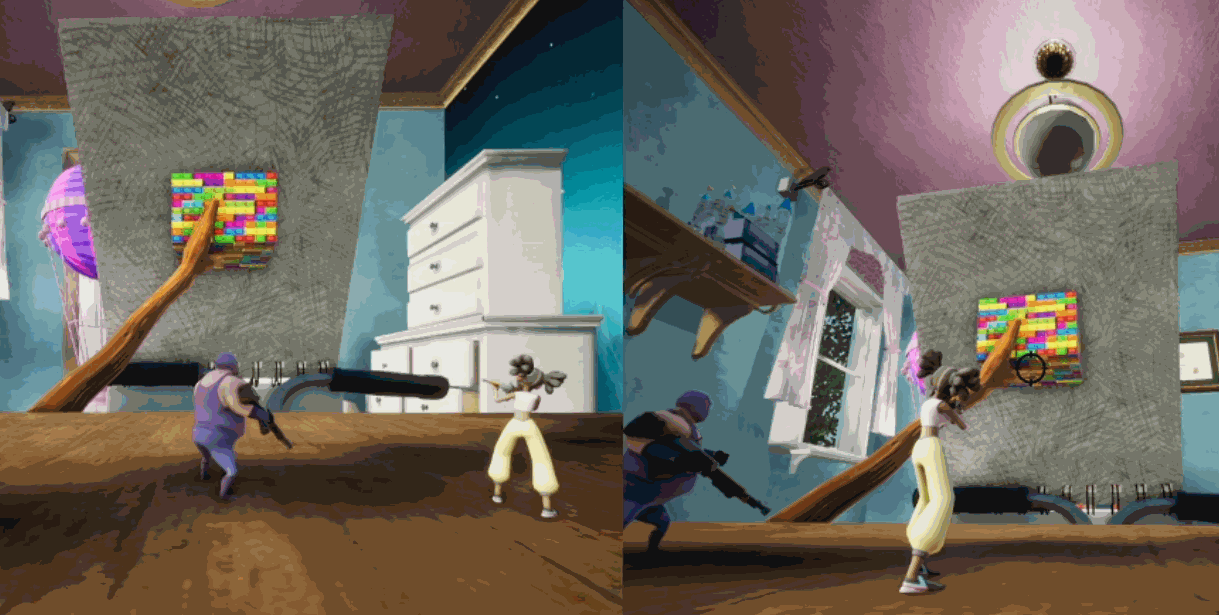
Utilizing Light To Frame The Objective
The lamp is shining light at the door to help draw attention to the door.
The light emitting from the lamp frames the door
suggesting to the player to interact with it.
Seen in the screenshot below:
_TEXT_PNG.png)
(Player Guidance)
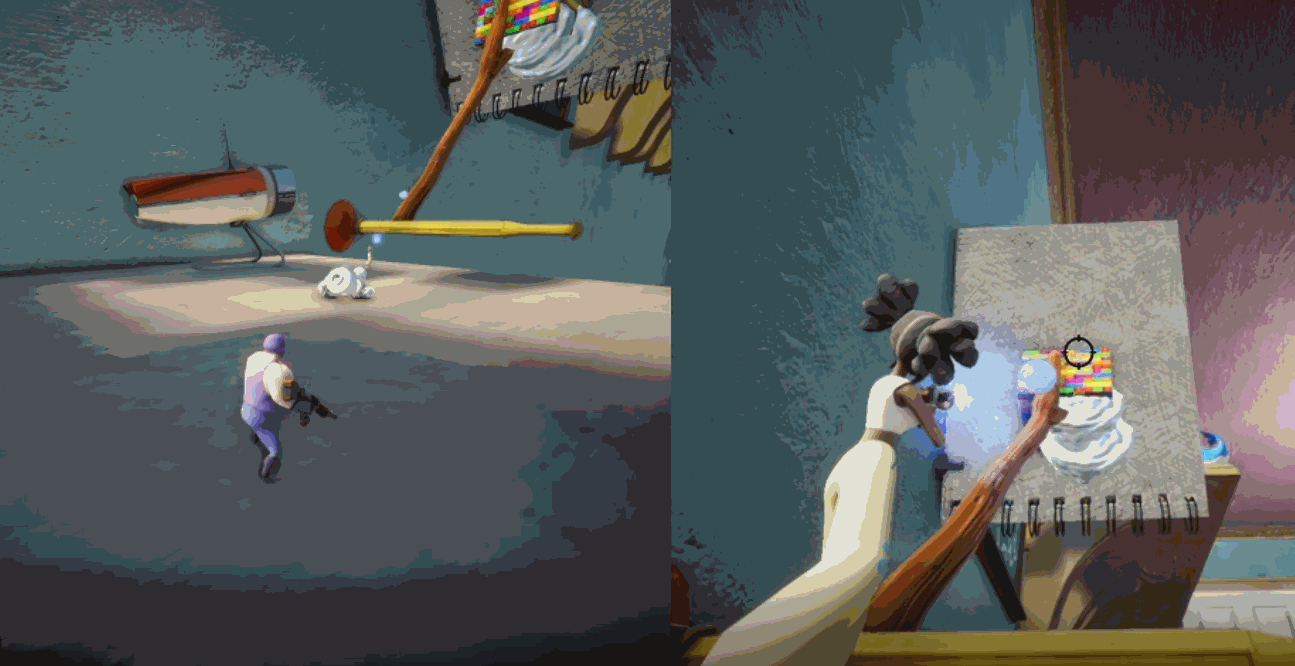
Teaching Players The Mechanics
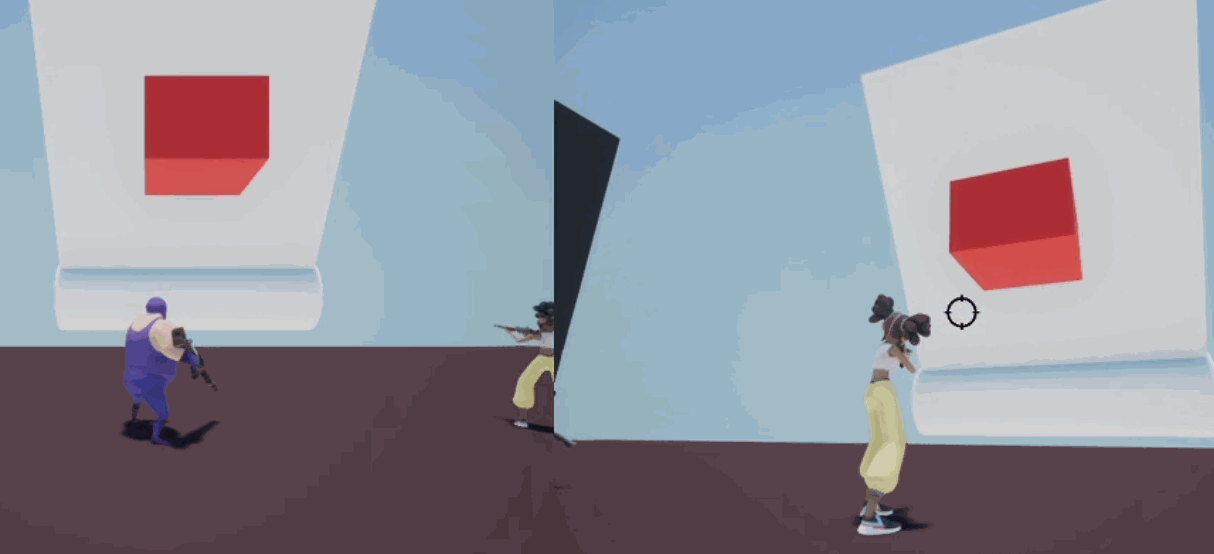
The onboarding at the start works by gating the players by placing a door that needs to be broken in order to progress.
The reason for gating the players is to ensure they learn how to combine their mechanics before progressing through the level.
To break the door. The players need to do the following:
One player freezes the door by shooting at it.
The other player explodes the door by shooting at it after the door has been frozen.
The players learn two things after this:
1. That they need to cooperate in order to progress.
2. That they can explode/destroy certain objects.
A visual representation of what has been described above can be seen below:

One player can freeze the door

The other player can explode the door once it has been frozen

After this has been done the players have learnt how they need cooperate in order to progress to the next part of the level
(Player Guidance)
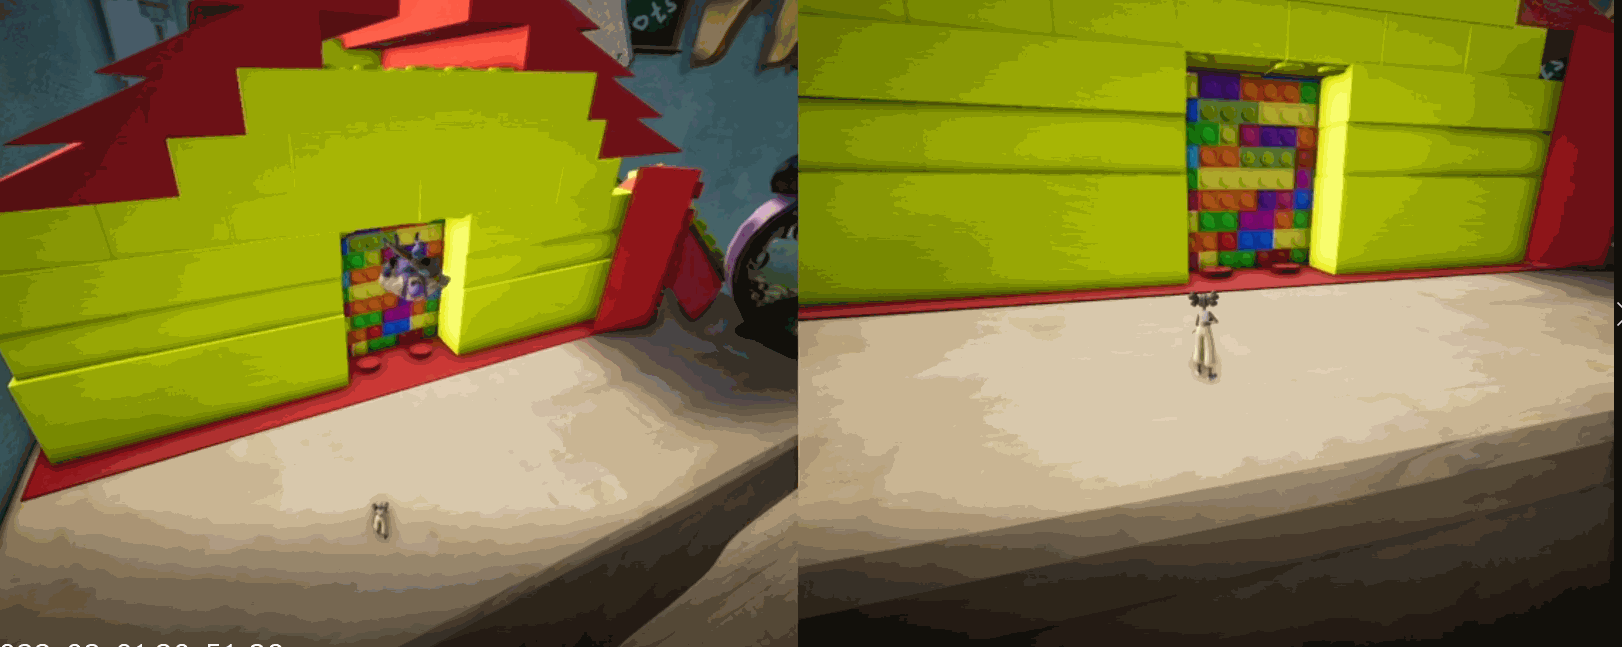
Using Familiarity To Guide Players
The first puzzle and the second puzzle has the same color patterns.
This helps the players to familiarize themselves with objects that are destructable.
The above mentioned can be seen in the screenshot below:

The first two puzzle objects have the same color patterns to help familiarize the player with objects that are desctructable


(Player Guidance)
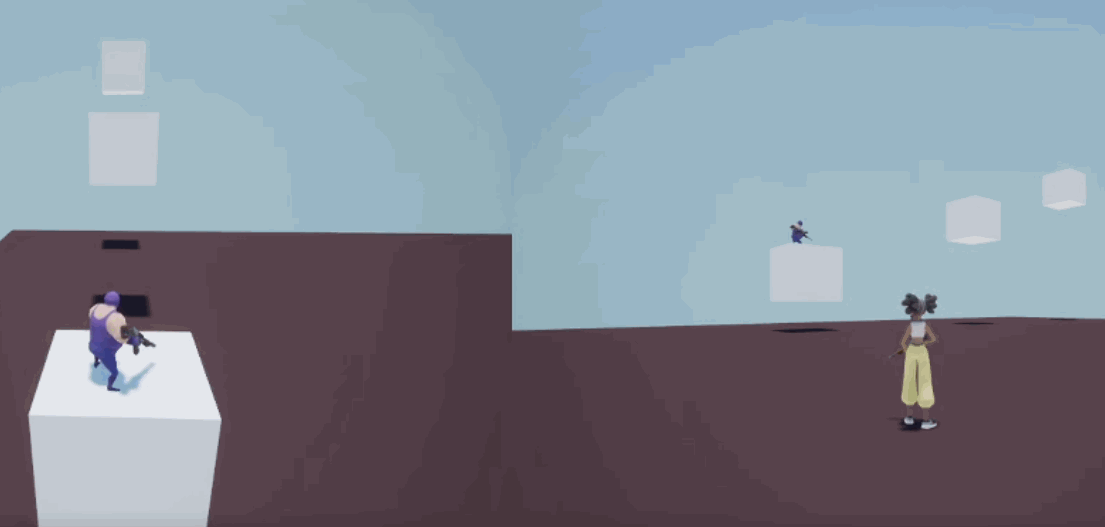
Using Contrast To Guide Players
To help draw attention to the cube puzzle I used strong contrast in colors.
The white color on the ground helps giving strong contrast to the button.
One player needs to stand on top of the button for the cubes to appear, meaning that both players need to cooperate in order to progress.
Below is a visual representation of the puzzle through the screenshots below:

The white ground helps to contrast the button to make it stand out

One player needs to stand on top of the button to make the cubes appear.
The icon on the button reinforces the connection
between the button and the cubes
(Player Guidance)
Using Colors & Shapes To Guide Players
The button connected to the balloon has a balloon icon
suggesting to the player that the button is connected to the balloon.
The button and the balloon is also using similar colors
to help suggest the connection between them.
When pressed down the balloon will escort the other player.
The gifs below demonstrate the above mentioned:
The balloon escorts the other player
so both can progress to the next part together

(Player Guidance)
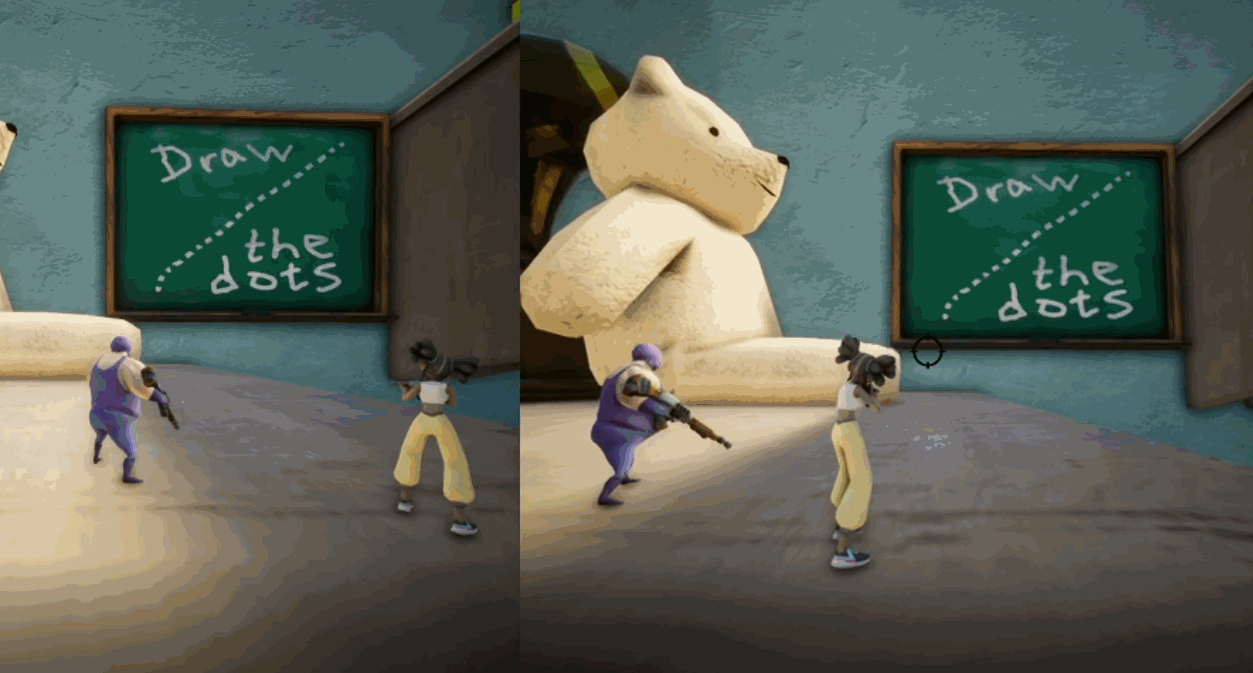
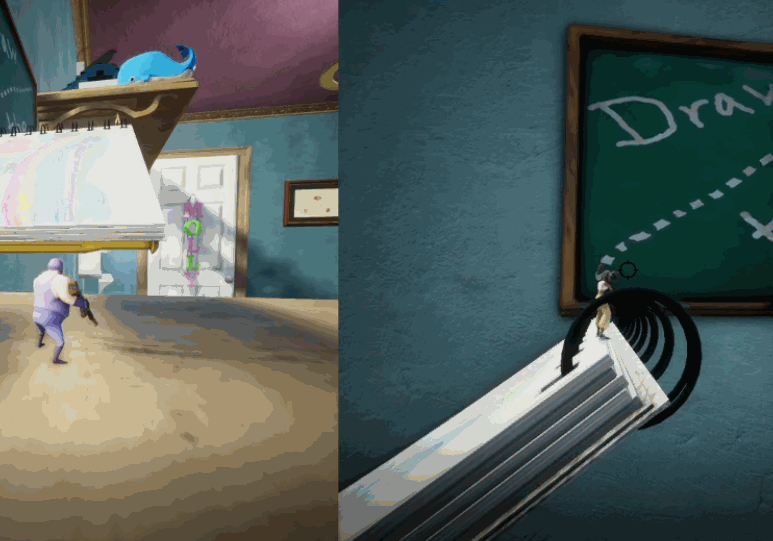
Using The Environment To Guide Players
The text "draw the dots"
hints to the player to shoot along the dots line.
When the player shoots the dots a climbable wall will be created.
Below is a showcase of the above mentioned:

(Player Guidance)
Using Object Angles To Guide Players
The text "draw the dots"
hints to the player to shoot along the dots line.
When the player shoots the dots a climbable wall will be created.
Below is a showcase of the above mentioned:

The objects are angled toward the "draw the dots" board to help guide the players to the objective (the board)
(Player Guidance)
Using Recurring Puzzles To Avoid Overwhelming Players
The "break door" puzzle is reused instead of a new one
to avoid overwhelming the players with too many new elements at once.
Both players are needed to break the door gating any player
so no player will be left behind.
The screenshot below showcases the door gating players:

Both players are needed to break the door
gating any player so no player will be left behind
(Player Guidance)
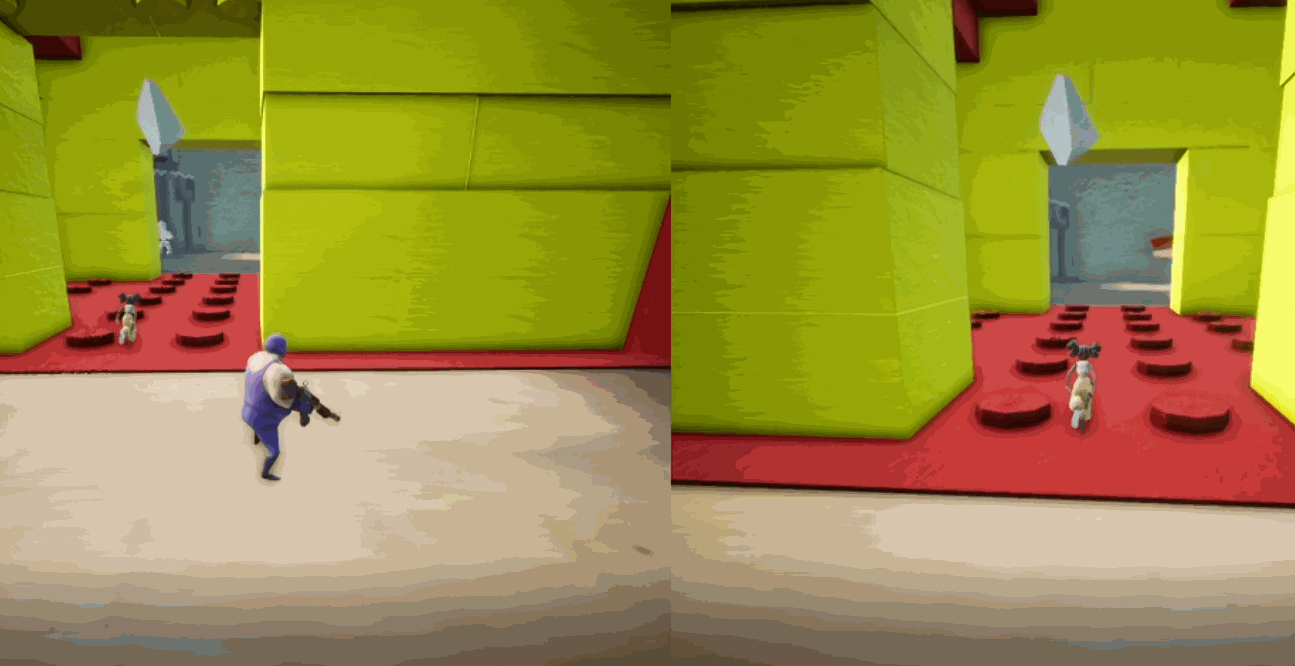
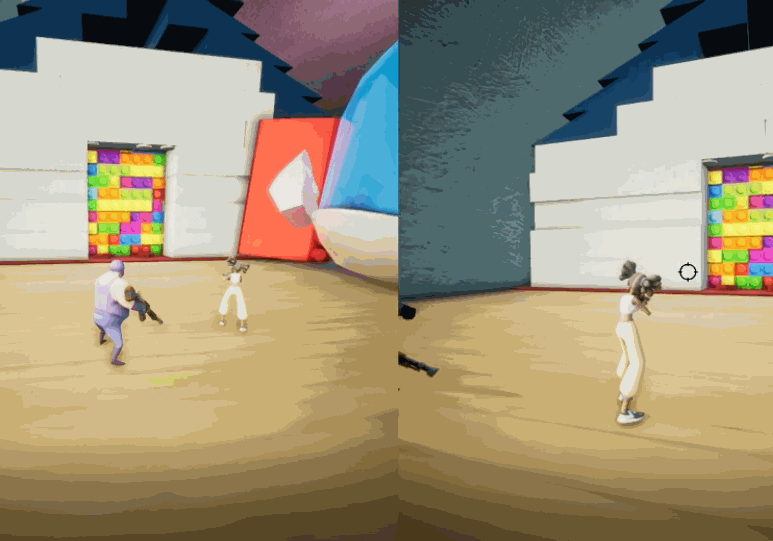
Teaching Players To Cooperate During First Enemy Encounter
During the first enemy encounter the players learn
to cooperate during combat.
One player can freeze the enemy.
The other player can destroy the enemy once it has been frozen.
The screenshots below gives a visual representation of the above mentioned:

Both players are needed to defeat the enemies

One player can freeze the enemies
